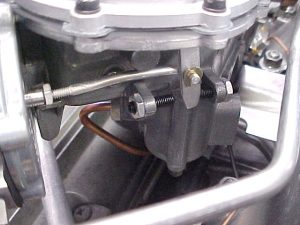
Calibrating a fuel injection unit is similar to selecting the right jets, power valve, and accelerator pump cam for a Holley carburetor.
Calibration means positioning the enrichment lever stops so that the unit has the best nozzle fuel pressures for efficient combustion. The two stops have an extremely wide range of adjustment. They can be set to provide nozzle fuel pressures that are much higher or lower than GM recommended pressures. The “economy” stop position controls the fuel pressure at steady cruising speeds. Under acceleration, the enrichment lever moves to the “power” stop to control the nozzle fuel pressure. The enrichment lever will stay on the power stop as long as the car is under hard acceleration.
One common misconception is that stop positions can be set on a workbench by using a vacuum gauge plumbed to the enrichment diaphragm. Actually, the only way to determine the proper stop positions is to measure the nozzle fuel pressure OR gauge the air / fuel ratio with an accurate exhaust gas analyzer. Both of these methods require the FI unit to be installed on a running engine. Once the stop positions are set, you then use a vacuum gauge to set the length of the enrichment diaphragm rod. The rod length controls when the enrichment lever travels from the economy stop to the power stop. This is similar to setting the timing of the accelerator pump shot on a carburetor.
The calibration will affect the settings of the other adjustable features on your fuel injection. In other words, you must properly calibrate a unit before you set the idle mixture, choke position, etc.
These are the other adjustable features that allow each Rochester FI unit to be custom tuned to work properly with a particular cam grind and engine displacement.
- Idle speed (idle speed screw)
- Idle fuel mixture (idle mixture screw)
- Fast idle speed (fast idle speed screw)
- Cold enrichment / choke fuel mixture (bakelite cover / choke butterfly position)
- Timing of enrichment lever movement (enrichment diaphragm rod length)

